Click and Chat Help Files
Welcome to the Click and Chat Help files Here you can find useful information about our chat client and portal software. Please click on the category to the left below to jump to that section. If you have any questions you don’t see the answer for please click on “Contact Us” to contact support.
Installing Chat Code
Click and Chat works by installing a few lines of JavaScript on your website which allows us the software to track visitors, serve up chat/text icons and dynamic invites as well as serve up the chat window.
Requirements
The Click and Chat JavsScript code should work with virtually any web platform as long as you can insert JavaScript. Our code requires the use of jQuery and we recommend version 1.11 or later. Since we are dependent on definitions from jQuery, our code needs to be placed after all jQuery has loaded. Also the code will need to reside on all pages you want chat/text on.
If you are utilizing the inline window (chat icon and window hover over your website) then you should place the code near the very bottom of the body.
If you are utilizing the popup window (chat icon is static and chat window opens in a separate popup window) then you should place the code on your website where you want the chat icon to be served up. You can choose the icon to be used in our settings portal.
If you are utilizing our stacked chat then you will need to place the code provided at or near the bottom of the body section of your website. In addition, to make sure mobile functions correctly you will need to have the following line on your page (usually in the header or near the top of the page):
<meta name=”viewport” content=”width=device-width, initial-scale=1.0″>
This is a common line of code that should be already on most web pages.
Getting your Click and Chat code
If you are using the 2018 Modern Client then when you download the client and login for the first time, a pop window will show the code you need to insert on your web page. This can be turned off so it is not shown on subsequent logins.
If you are going to be using the 2018 Modern Client or already have your client installed then any user can always go to their settings portal (your server name with /settings/ added to the end of the URL). From their make sure the correct site is chosen in the drop down box and then hit “Edit this Site” and your code will be displayed.
Troubleshooting
Most issues that customer have with their chat window or icon not showing up or functioning properly has to do with jQuery conflicts. Our software will try to detect if jQuery is already loaded on your site and if not will load its own version. However sometimes customers load jQuery with functions or change the file names and so even though jQuery is loaded we don’t detect it and load our own version. Then there are conflicts between the two versions.
If you think this is the case you can troubleshoot this by loading the code on a test page with and without your jQuery to see of that will work. Either way if we need to suppress our loading of jQuery we can create a custom file to do that, just contact support.
Using the 2018 Modern Chat Client
The 2018 Click and Chat Software Client allows agents to track visitors, answer chats, communicate with each other and monitor chats.
Installation
Before using the Click and Chat client for the first time, it must be installed. This is done by downloading the installer here and running it. Once installed, you can launch the client from a desktop shortcut or the start menu. Once opened, the client will continue to run in the system tray. The client has been optimized for Windows 10 but is backward compatible to Windows 7.
| When you run the installer you may see this image popup saying Windows does not recognize the publisher (The Mansard Group – our parent company). Please click “More Info” and on the next screen click on “Run Anyway” | 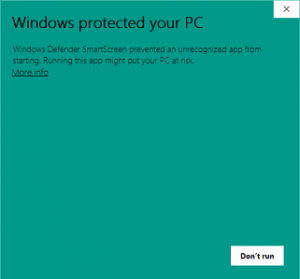 |
Login
The login screen will appear when opening the client. Every user will have their own username and password, as given out by an administrator. All details other than the password are remembered.
On your first login, you will also be asked to enter the Click and Chat server and the authentication string. Click on ihe Advanced Settings in order access these fields. These will be provided by an administrator. Your name is what will appear when chatting with a visitor, and your department is the department that will appear in the transfer list for other agents to see.
If you have a firewall or proxy in place, you may need to allow outbound connections over port 8011 to the Click and Chat server. Also when creating users keep in mind that two people cannot login with the same Name to avoid confusion when chatting to a visitor.
Setting your status
Your status determines whether or not you are available to chat. You will only see notifications for new chats when your status is set to Online; not if your status is Busy, Be Right Back or Away. Your status is visible to other agents.

At least one agent must have their status set to Online in order for a visitor to be able to chat. Depending on the configuration of your chat, visitors may be given an offline message or simply not able to see the chat button with no agents online. Also if you are online but outside of your configured working hours then visitors will not be able to chat either.
Setting Personal Options
The ‘Options’ tab allows you to toggle certain options on and off. These are personal options and do not affect other agents.
- Keep running in system tray when window closed – When enabled, and you close the Client window, it will continue running in the background and you will still receive any notifications
- Show popup notifications – When enabled, you will see pop-up notifications for important events in Click and Chat, even if the Client is minimized or running in the system tray
- Enable spell checking – When enabled, incorrectly spelled words will be highlighted. Right-clicking will give suggestions to correct the words
- Set my status to away on start up – When enabled, your status will be set to Away upon opening the Client, rather than Online
- Auto away after 5 Minutes of inactivity – When enabled, your status will automatically be changed to Away after a certain period of inactivity on the machine
- Auto logout after 30 Minutes of inactivity – When enabled, the Client will log you out after a certain period of inactivity on the machine
- Logout when computer locked – When enabled, the Client will log you out whenever the Windows lock screen is used
- Always show canned responses window – When enabled, the Canned Responses window is always shown in the chat, rather than being toggled on and off
- Show suggestions when typing – When enabled, suggestions will be shown to you based on your previous responses. You can select a response from suggestions using the Tab key
- Auto monitor all chats – When enabled, you will automatically monitor all chats in progress for all agents
- Show all visitors on start – When the program starts, it will load a list of all the current visitors. When turned off, you will only see visitors from the point that you log in
- Show only icons on the toolbar – Removes text labels to show only icons on the side toolbar
- Show Emoji popup when chatting – Shows the option for entering Emoji into the chat
On the Chat tab when setting personal default messages, you can use the following values:
- %NAME% – Visitor name
- %MYNAME% – Operator name
- %MYSMS% – Operator SMS number
- %MYDEPT% – Operator department
- %GREETING% – Operator’s greeting message (taken from the local machine and preset to Good Morning/Good Afternoon/Good Evening depending on the Client’s local time)
- %DATE% – Current date
- %TIME% – Current time
- %MYTITLE% – Operator’s title
- %SITENAME% – The domain’s name within Click and Chat
- %DOMAIN% – The domain within Click and Chat
- %MYEMAIL% – Operator’s email address
- %MYPHONE% – Operator’s phone
Picking up a chat
If you are not configured to automatically pick up chats, and your status is set to Online, then you will be notified when a visitor requests a chat from the site. This notification will appear even if the Client is minimized, and clicking it will open the chat window and begin the chat with that visitor.
You will also be able to manually accept a chat by clicking on it from the Chats panel of the Client.
If Chat Routing is configured, only Users with the relevant skill will be notified of an incoming chat. Users without that skill may be able to pick up the chat from the Client, depending on their User account permissions.
If chats are not set to be auto-accepted, all available users will see a chat notification. The first user to click the notification will pick up the chat; any others users clicking the notification will see a message to say the chat has already been taken.
A chat that is not immediately picked up will send reminder notifications every 30 seconds until it is picked up, times out or the visitor leaves.
Chat window
The chat window is what you will see when chatting with a website visitor. You will see messages sent by both you and the visitor, as well as a preview of what the visitor is currently typing.
Messages sent by yourself or the visitor will appear immediately in the chat window. You will also see Server messages here, for example when the chat is transferred or closed by the visitor, but these messages are not visible to the visitor.
As long as it is enabled in your site settings, you will see a preview of what the visitor is currently typing. This shows anything entered in the chat box by the visitor, even if they never send the message. The visitor will see a notification when you are typing back, but they will never see a preview of what you are typing.
Chat options
The visitor’s status and current mood (based on the conversation so far) are shown above a summary of their information. You can see more information about the options by hovering over them.
The mood indicator only appears once enough has been said in the conversation to identify it as positive or negative, indicated by a happy or sad face near the visitor’s name.
As you start typing, the text box will pop up with suggestions based on your recently sent responses. There are options at the side for inserting emoji or canned responses, as well as sending and receiving files.

- Close Chat Ends the current chat for you and the visitor
- Transfer Chat Transfers the chat to another user, or a group of users
- Request Monitoring Sends a notification to a moderator user to monitor the current chat
- Email Transcript Allows you to email a transcript of the chat so far
- Submit Ticket Only available if ticketing is enabled, this will take the transcipt of the chat and create a ticket
- Block Visitor Places a temporary block on the visitor’s IP address, preventing them from requesting a chat for the rest of the day
The chat options are only available to you during an active chat session, while the chat is in wrap-up (after the visitor has left but before you close the chat) you will still have access to Email Transcript and Submit Ticket.
Canned responses and suggestions
Any words that Click and Chat recognises as a keyword in the conversation will appear in bold. Clicking one of these words will bring up the canned responses window, suggesting canned responses based on the keywords. From the canned responses window, you can select other keywords from the conversation, or manually enter your own to search for.
You can also select a canned response manually from the list of canned responses, and click to send that to the visitor.

Global Canned Responses are created by Administrator users, and are available to all users. Keywords are generated automatically by Click and Chat based on the content of the Canned Responses and do not have to be configured manually.
The Canned Responses window is shown when clicking the Canned Responses icon, or pressing Ctrl + R. There is also an option to always show the Canned Responses window inside Options.
Transferring a chat
Clicking Transfer will bring up a list of logged-in agents and departments, with a color-coded status. Transferring to an agent will send them a notification to pick up the transferred chat.
If you transfer to a user and they do not accept the transfer notification, the chat will be placed back into a waiting status and all users will receive notifications that the chat needs to be picked up at 30 second intervals.
When a chat is transferred, the user that picks up the chat will be able to see everything said so far in the chat.
The visitor is not notified when a chat is being transferred.
File Transfers
Any type of file can be sent to the visitor through the chat. You can manually pick a file to send with the ‘Send File’ option, or start typing a file name to see suggestions of recently sent files.
Visitors can only send a file when you request one using the ‘Request File’ option. The sent file will appear as a link inside the chat.
Click and Chat supports any kind of file, since it is downloaded through the browser and opened with any relevant program on the user or visitor’s machine. The file types that can be sent can be restricted in the Settings Portal. The maximum size of file that can be transferred is 10mb.
Visitors will not see an option to send a file through their chat window, this only appears when you use the Request File option.
Tagging
You can tag operators to get assistance inside a chat by using the @ symbol and typing an agent or department name.

Getting assistance allows you to chat to another agent without leaving the chat window.

Requesting assistance this way will not send a notification to the tagged user, it will open an operator-to-operator chat window for the tagged user. This means it is possible to chat to the a visitor and another operator at the same time.
You can tag any user to request assistance in this way, but users without permission to monitor a chat will not be able to see your conversation with the visitor.
Monitor and mood
Clicking a chat in progress with another agent allows you to monitor the chat (if you have that right), to see what is being said by the agent and visitor. While monitoring a chat you can type messages which will appear as a whisper that only the agent can see.
The mood indicator only appears once enough has been said in the conversation to identify it as positive or negative, indicated by a happy or sad face near the visitor’s name.
Any message you send while monitoring will be a whisper. Whispers are only visible to the user, and never the visitor. It is not possible for you to send a message that is visisble to the visitor while monitoring a chat.
If you whisper to a user, they cannot whisper back to you. If you want to have a conversation with the user, rather than just passing information, the user can use the Get Assistance function.
Monitor all
The Monitor All option allows a supervisor to monitor any chats that are currently in progress. Any current, waiting or queueing chats for all operators are shown, along with a real-time preview of the transcript.
Using Monitor All gives a dashboard view of all chats. Chats are colour-coded based on their status, so you will be able to see when a chat is in progress, waiting or queueing. Chats are removed from this view when they end.
As well as seeing the content of all chats in progress, you will be able to see a sentiment indicator for the chat once there is enough information in the chat to identify it as positive or negative.
Team view
The team button shows any Agents currently logged into the Client. You can start a chat with an Agent by clicking their name. Agents in the team view are group by their status, allowing you to see who else on the team is available.Typing messages in the Agent chat gives you the same tools as typing to a visitor, including Emojis, Canned Responses and Sending Links.
Sites Summary
The sites summary displays information on visitors and chats on the site for so far the current day and month.These reports are based on information gathered by the Click and Chat tracking code and any Prospect Detection rules that are set up in the Settings Portal. The percentage indicator is based on the average for the weekday. 100% on a report would mean that the result is exactly average for that weekday.
Missed chats
When a chat request cannot be answered by an agent the visitor will be asked to leave their email address and a message and the chat is recorded as a missed chat. You can add a response to a missed chat in the same way as you would a normal chat, but sending this response will instead send an email reply to the visitor.
A missed chat may occur for a number of reasons. These include the visitor clicking the chat button outside of your office hours, no agent being free in the department that the visitor chose, or the queue being full.
Pending Missed Chats will always show any missed chats, even if the visitor has not chosen to leave a message. If you respond to a missed chat, or use the close chat button within the missed chat, it will be removed from the pending missed chats list.
Active visitors and dynamic invites
Active website visitors are shown under the ‘Active Visitors’ tab. Any of these visitors can be invited to chat by using the ‘Send Invite’ option. This sends an invite graphic that the visitor can click on to chat.
Dynamic Invites should be configured in the Settings Portal for users to be able to send them. You may have several different invites configured at any time, and the user can choose which to send. When setting up the invites in the Settings Portal, you can also set each invite to be sent automatically to visitors on a certain page.
When choosing a visitor to send an invite to, the color next to them indicates their status – visitors with a yellow mark may have your page open in a browser but not in the active tab, so they may not see or respond to your invite.
Previous chats
Clicking the Sites button and selecting a site allows you to view previous chats that have taken place on that site. You can move between dates using the arrow controls, and filter the chats by operator, department or visitor name. The chats in the list are seperated by missed and taken, and will also show the rating if one was left by the visitor.
Settings Portal
The Click and Chat Settings Portal allows you to configure all the options that control how chats are answered, routed and stored from your website as well as user accounts.
Accessing the portal
In order to access the Settings Portal you will need access to a web browser. The address for the portal will be your server name with /settings/ after the URL.
Adding and editing users
To access the Click and Chat Settings Portal, each user must have a user account set up for them. You can use the same login for the chat client.
You can add a user via the Add User button. The New User screen will ask for the information. You must enter a User Name and Password, which will be used by the user to log into the Client, and a Full Name and Email Address are required so that Click and Chat can send emails to that user. The Default Role determines what permissions the User will have by default. The other options on this screen are optional but can help your users have the best Click and Chat experience.
The User Assigned Sites contains a list of the sites that this user will be able to take chats from. There should be at least one site in the User Assigned Sites list for this user to be able to chat.
Under the Advanced Options, you can set up contact details to keep track of your users, and set up permissions for each user to determine exactly what they are able to access inside Click and Chat.

When editing a user, you will have the same options screen as creating a new user. Any changes that you make here may cause the user to log out of the Client before the changes take effect.
User groups
User Groups are an easy way of controlling the options and permissions of a group of users. When you create a User Group you will set the key options for your Users – this includes the Basic and Advanced Options – and these will then be applied to any Users you create inside or move into the group.
If you are planning on creating multiple users, it is recommended that you create the groups first to save time by not having to edit each user’s options separately. Once a User is in a group you can change their options individually, but they will never have access to a setting that is not available for the group.
Canned responses
Canned Responses are pre-set responses that will be visible to all users. Responses contain a subject, which will appear to users who are searching Canned Responses, and content, which is what is sent in the chat.
Canned Responses are automatically searchable based on their content, but you can also add keywords manually to make the response easier to find.
Chat window design
The Chat Window Design gives you the options for designing your chat window as it will appear to users. Changes you make to the options will be reflected in the window preview on the right-hand side. Some options here may only be visible when other options are selected. Options do not take effect on your site until you click “Save Changes”.
Chat window options
The Chat Window Designer allows you to customize your chat existence for your website visitors. You can choose different themes, colors and sizes as well as chosse our moden stacked chats. You will see a preview of your customer window in the pane to the left (except for stacked chats). At the bottom you can choose a custom icon and logo for both desktop and mobile.
Chat routing
Chat Routing can use your Start Chat Survey or other information about the customer to route them to different Users based on departments or skills. Chat Routing is condition based: you would set up a condition, for example looking at what option a visitor has chosen from a drop-down box in your Start Chat survey, and you can then route the chat through to a group of users. Chat Routing also contains advanced options for forwarding or queueing chats that match your conditions.
Dynamic invites
Dynamic Invites are pop-up images that can be sent to visitors. The visitors can click on these images to start the chat. You can use your own custom images when making an invite, and set how it will appear on the visitor’s screen.
Invites can be sent using Auto Send, meaning that invites can automatically be sent to visitors on certain pages. Invites are only sent in this way when you have users logged in and online.
Prospect detection
Prospect Detection is a way of capturing prospective customers on your site, based on their browsing activity. This information is fed into the reports, and can be used to send automatic invites.
You can set up detailed conditions to make sure you are able to capture your most important visitors, invite them to chat and report on their activity.
Reports list
Glossary
Visit – 1 visit will start from when a connection is made to your site and ends when Click and Chat clears that visitor from the Current Visitor list. This can happen after a period of inactivity or when the visitor leaves the site.
Prospect – A Visitor who has activated one of the Prospect Detection rules based on the behavior you have outlined.
Customer – A Visitor who has activated one of the Prospect Detection rules based on the behavior you have outlined which also has the Action When Detected ‘Flag As Customer’ enabled.
Spider – An automated bot that scours the web, mainly used to keep search engine data up to date.
Chat Request – A chat request is anytime a visitor clicks on a ‘click to chat’ link and then proceeds to ‘Start Chat’, this will include all chats including those that have been picked up by and operator and those that have been missed.
Missed Chat – A missed chat is when a visitor starts a chat but is not picked up by an operator, this will include chats that operators have failed to pick up and chats that have come through when no operators are available
Visit Number – The number of times a visitor has ‘visited’ your site.
Operator – A person who accesses and uses the Click and Chat Client application.
Date Selector – This allows you to pick a from and to date for the period of reporting.
General
Daily Totals
Visits – Total number of visits to the site.
Entry Alerts – Free – Total number of visitors that have activated a ‘Free’ Site Entry Alert.
Entry Alerts – Paid For – Total number of visitors that have activated a ‘Paid for’ Site Entry Alert.
New Visitors – Total number of visitors that have not been to the site before.
Returning Visitors – Total number of visitors that have been to the site before.
Visitors By Alert Type – Total number of visitors grouped by Site Entry Alert. The selector for the different Site Entry Alerts is present in the top right corner of the report.
Spiders Only – Total number of Spiders that have been to the site.
Cost – Total cost calculated from Site Entry Alerts on the selected site.
Summary – Displays a variety of Summary information for each day in relation to the site. Contains totals for: Visits, New Visitors, Prospects, Customers, Alerts free, Alerts Paid, Views, Invites, Chats, Missed Chats, Peak Visits, Peak Visit Time.
Keywords with Phrase– You are prompted to enter a phrase then a chart is displayed with the total number of visits that used that phrase in their search engine query that took them to your site.
Average, Min & Max
Minimums By Day – Displays the minimum Visits seen on a day of the week for the selected date range
Maximums By Day – Displays the maximum Visits seen on a day of the week for the selected date range
Visitors By Country Name – Pie Chart displaying the total visitors grouped by Country
Times of Day – Total visitors on the site grouped by hour of the day.
Prospects
Prospects – Total number of visitors who matched any one or more Prospect Detection rules.
By Alert Type – Total number of visitors who match any one or more Prospect Detection rules, grouped by Site Entry Alerts. The selector for the different Site Entry Alerts appears in the top right of the report.
Percentage Of New Visitors – This is an argument against the value to see the percentage of visitors that are new visitors and convert to a Prospect or Customer.
Customers
Customers – Total number of visitors that have been flagged as a Customer.
By Alert Type – Total number of visitors that have been flagged as a Customer, grouped by Site Entry Alerts. The selector for the different Site Entry Alerts appears in the top right of the report.
Percentage Of New Visitors – This is an argument against the value to see the percentage of visitors that are new visitors and convert to a prospect or customer.
Chats
Chat Requests – Total number of Chat Requests.
Missed chats – Total number of Missed Chats.
Chat Listing – A list of all chats includes the following information: start time, how long the visitor waited for before being picked up, the operator who took the chat, the department the chat was assigned to, the visitor’s name, the visitor’s DNS, The visit number, the end time of the chat and the email of the visitor if collected.
Average Waiting Time By Operator – Total and Average waiting time of visitors who started a chat, grouped by Operator.
Average Waiting Time By Department – total and Average waiting time of visitors who started a chat, grouped by Department.
Daily Summary – A summary of chats displaying the Total Chats, Average waiting time of chats and the average length of a chat grouped by date and Operator.
Daily Chat Report – Displays summarized chat statistics grouped by date. Includes the following information: total chat requests, total chats that were taken, total missed chats, total visitor waiting time, average visitor waiting time, total length of time in chats, average length of time in chats.
Total Taken vs Abandoned – Pie chart displaying the total number of Taken Chats and the total number of Missed Chats.
Day Time To First Line – Average number of seconds by day for the first message to be sent in the chat.
Chat Peak Times – Peak number of concurrent chats broken down by hour of the day.
Chat Inside Expected Time – You are prompted for a time in seconds, then a pie chat is displayed to show how many chats were completed inside that and time and how many were outside.
Missed Chats By Hour – Shows the amount of chats that were not picked up by operators for any reason from the date range grouped by hour of the day.
Taken Chats By Hour – Shows the amount of chats that were picked up by operators for any reason from the date range grouped by hour of the day.
Referrers
Top Referrers – Summary information for the most common referrers for the site. Includes: total visit number, total new visitors, number of visitors that activated a prospect detection rule, number if visitors flagged as a customer.
Top Search Engines – Summary information for the most common search engines for the site. Includes: total visit number, total new visitors, number of visitors that activated a prospect detection rule, number if visitors flagged as a customer.
Top Referrers Containing – Prompted for a phrase then displays summary information where you phrase matches a referrer. Includes: total visit number, total new visitors, number of visitors that activated a prospect detection rule, number if visitors flagged as a customer.
Keywords
Top Keywords – The Top Keywords report lists the most common keywords entered when visitors access your site via a search engine. This also shows how many of these visitors converted as prospects or customers.
Top Keywords By Search Engine – This report shows the most popular keywords used to locate your site by visitors, as well as the search engine that was used to find your site.
Top Keywords Containing – This allows the same report as the Top Keywords, but you can enter all or part of a word or phrase to filter the results.
Pages
Top Pages – This report shows the most visited pages on the site, ordered by the most visits. This also shows the amount of new visitors for these pages, and the number of chats initiated on each of these pages.
Top New Visitor Entry Pages – This report shows the first page that new visitors to you site view, ordered by the most popular. Returning visitors are not counted towards this report.
Specific Page Search – The specific page search allows you to enter a page name, and will display the details of each visitor on that page for the last month.
Page Bounce Rate – The bounce rate shows which pages are viewed by visitors who then leave your site without viewing any other pages. This view is ordered by bounce ratio – a bounce ratio of 100% on a page means that every visitor who viewed that page left the site without viewing any other page.
Page Errors – This report shows any page requests that are not 200 OK codes. This is typically only usable with log file tracking.
Users
User Chat Report – Summarized chat information grouped by user. Includes: total number of chats, total visitor waiting time, average waiting time, total handling time, average handling time.
User Time To First Line – Average Number of seconds each user has taken to send the first message in a chat.
User Connection Details – For each user that has logged in during the date range, shows the total accumulated time an operator was online and available, as well as when status was set to busy, BRB and away. The report also shows chats picked up and invites sent for each operator within the time range.
Browsers
Top Browsers By Major Version – Reports the most popular Browser versions used by visitors.
Top Browser Type – Most popular Web Browsers.
Tickets
Tickets Per Day – The total number of tickets received for each date.
Ticket Source Breakdown – A Pie Chart displaying the various sources of tickets i.e. Email, Web Form, etc.
Time of Day Received – A breakdown of tickets received grouped by hour of the day.
Ticket Status for Time Period – A Pie Chart of the status of tickets covering the selected Date Period.
Ticket Replies Sent – Total number of ticket replies sent for each date.
Ticket Replies Received – Total number of ticket replied received for each date.
Ticket Close Time by Operator – Average length of time for an operator to close a ticket after opening.
Avg Time To First Response – Average time to the first response of a ticket for each date.
Ticket List – Produces a list and details of all tickets. Includes: Ticket ID, Source, Status, Open Date, Due Date, Closed Date, User that has taken the ticket, Ticket’s email address and ticket subject.
Summary – Summarized ticket information for each date. Includes: Date, total new tickets, total unopened tickets, total closed tickets, total overdue tickets, total active tickets, total replies sent, total replies received, total bytes sent, total bytes received
Request a Feature or Open a Ticket
If you have any questions that aren’t answered by our help files, please feel free to contact out support team.